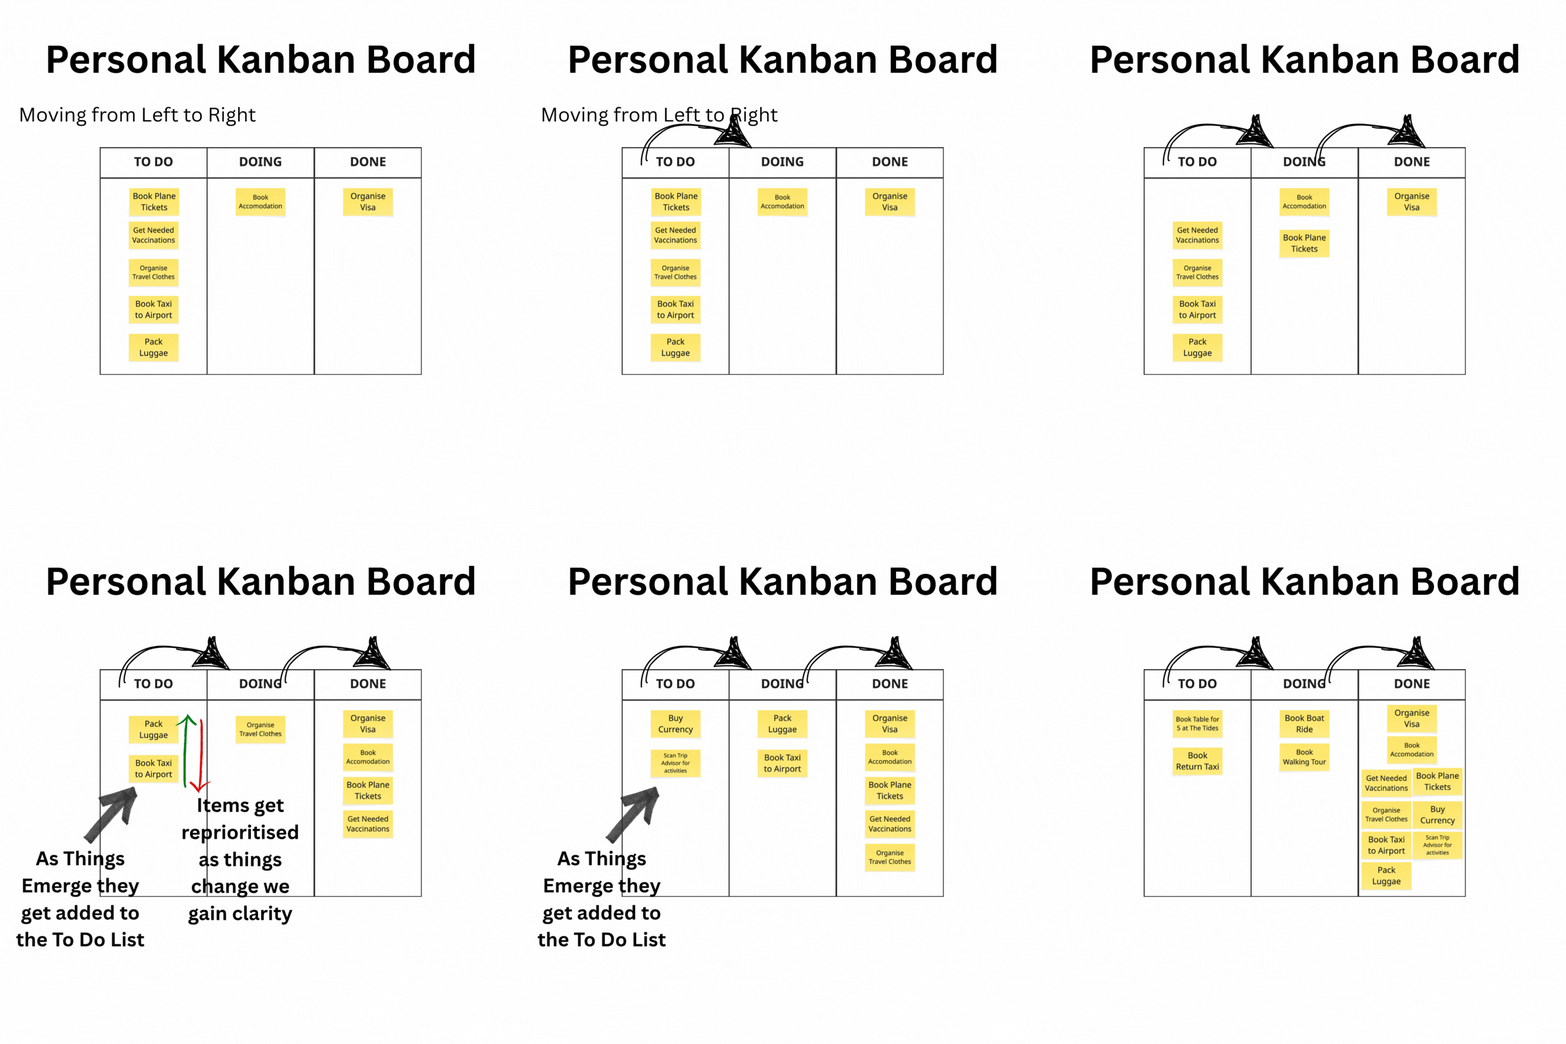
Setting up your first Kanban board is a great way to keep your team aligned, tasks organised, and work visible. Follow these steps to create a board that supports smooth workflows and clear communication.
What you need:
A whiteboard, flip-chart or clear wall space
Sticky notes (any colour; different colours work too) /. alternatively you can customise and use these Kanban Cards.
A marker / Sharpie
(Optional) Painter’s tape or washi tape to outline columns
Use your marker (or tape) to divide your surface into three vertical sections:
| To Do | Doing | Done |
Label each at the top / alternatively use the headers provided in this Kanban Cards deck.
Tip: Tape makes tidy lines and helps you stay within the board’s “swimlane.”
Grab a sticky note / or a Kanban card.
Write one task per note (e.g. “Buy groceries”), add minimal details as needed.
Stick it under To Do.
Repeat for “Clean kitchen” and “Call plumber.”
Doing: Only 2 notes here at once (your WIP limit).
When you start “Buy groceries,” move that note to Doing.
When it’s done, move it to Done—and celebrate that visible win!
To Do Doing Done Buy groceries Clean kitchen Call plumber
Move “Buy groceries” → Doing → Done.
Then pick “Clean kitchen,” and repeat.
You’ll see the flow—To Do → Doing → Done—in just three sticky-note moves.
Once you’ve got the hang of three columns, you can add:
Blocked (for stuck items)
Review (for feedback loops)
Altitude view (group cards under big themes or projects)
—but only when you need them. Keep it simple first.
Q: What if I end up with five notes in “Doing”?
A: Reset your WIP limit. Move extras back to To Do or finish one before adding another.
Q: How often should I update the board?
A: Immediately—move a note as soon as its status changes. A daily glance is all you need to keep momentum.
Q: Can I use index cards or paper scraps?
A: Yes—anything you can write on and stick/move will work. The goal is visual flow, not the medium.
Q: What about the “altitude”?
A: At a leadership level think ‘strategy’, at an operational level think ‘tasks’ - Your Post-IT/card title should be limited to 5-7 words (focus), In a sentence summarise the ‘why’, add the name of the lead (accountable), add a start date and a deadline.
Ready? Clear a wall, grab your sticky notes, and make your first To Do card now—then watch your progress come to life.
A Personal Kanban Board

How things flow on a Kanban board
